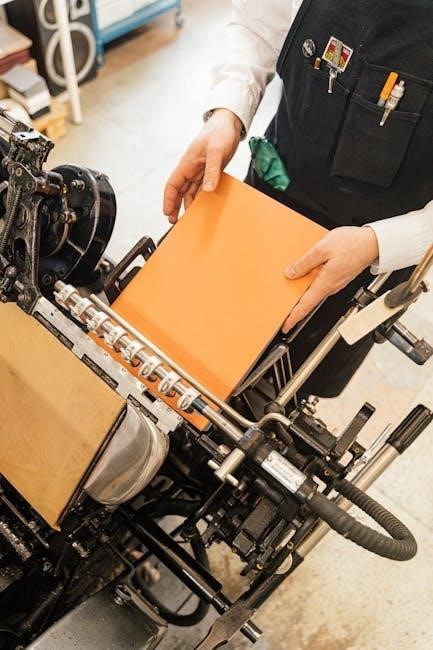
drill centering guide
Drill centering is a fundamental technique for creating precise, accurately aligned holes. It ensures stability and alignment, crucial in metalworking, woodworking, and machining. Using center drills, this process prevents drill bit wandering, ensuring straight and centered holes every time.
1.1 What is Drill Centering?
Drill centering is a precise machining technique used to create an accurately positioned starter hole or conical indentation in a workpiece. This process ensures proper alignment for subsequent drilling operations, preventing drill bit wandering and enhancing overall accuracy. Center drills, which combine a drill bit and countersink, are typically used for this purpose. The technique is essential in metalworking, woodworking, and manufacturing, as it provides a stable starting point for drilling straight, centered holes. By creating a guide for the drill bit, centering helps maintain precision and consistency, especially in materials like metal, wood, or plastic. This method is crucial for projects requiring high tolerances, such as machining parts, assembling furniture, or installing hardware. Proper drill centering minimizes errors, reduces material waste, and ensures a professional finish in both industrial and DIY applications.

1.2 Importance of Accurate Drill Centering
Accurate drill centering is crucial for achieving precise and professional results in various applications. Misaligned holes can lead to costly repairs, material waste, and compromised structural integrity. Proper centering ensures that the drill bit starts in the exact desired location, maintaining alignment throughout the drilling process. This is especially vital in machining and manufacturing, where even slight deviations can render parts unusable. Accurate centering also prevents drill bit wandering, which can result in uneven surfaces or damaged tools. In woodworking, precise centering is essential for creating clean, professional joints and assemblies. Additionally, accurate centering enhances safety by reducing the risk of accidents caused by misaligned or unstable drilling operations. By ensuring holes are drilled straight and true, accurate centering contributes to the overall quality, durability, and functionality of the finished product. It is a foundational skill that underpins successful project outcomes across industries.

Tools and Equipment Needed
Essential tools include center drills, twist drills, and drill presses. Accessories like vix bits and transfer punches aid in precise marking. Proper equipment ensures accurate centering and prevents drill bit misalignment during operations.
2.1 Types of Center Drills
Center drills are specialized tools designed to create precise, centered pilot holes. They typically feature a 60-degree included taper, which ensures accurate alignment and prevents drill bit wandering. Standard center drills are commonly used for general-purpose machining, while combination drills integrate a countersink for creating angled holes in one operation. For specific materials like stainless steel or titanium, coated or carbide-tipped center drills are recommended to enhance durability and performance. Split-point designs help reduce thrust force and improve positioning accuracy. Adjustable center drills are also available for applications requiring variable hole diameters. Each type is tailored to specific machining needs, ensuring optimal results in metalworking, woodworking, and other precision drilling tasks.
2.2 Essential Drill Bits for Centering
Essential drill bits for centering include twist drills, spade drills, and forstner bits, each serving specific purposes. Twist drills are the most common, featuring a 135-degree split point for precise alignment and reduced wandering. Spade drills are ideal for larger holes, offering efficiency and straight cutting. Forstner bits excel in woodworking, creating flat-bottomed holes with accuracy. Brad-point bits are another option, designed for woodworking with a sharp center point for precise starts. Coated or carbide-tipped bits are recommended for hard materials like metal, ensuring durability. Adjustable drill bits allow for variable hole sizes, enhancing versatility. Proper drill bit selection ensures accuracy and prevents misalignment. Always choose the right bit for the material and task to achieve optimal results in drilling operations. Sharp bits and appropriate speeds further enhance precision, making them indispensable for successful centering.

Marking the Center Accurately
Accurate center marking is crucial for precise drilling. Manual techniques like center-punching and using awls ensure correct alignment. Precision tools, such as transfer punches, guarantee exact center location. Always verify marks before drilling to maintain accuracy.
3.1 Manual Marking Techniques
Manual marking techniques are essential for identifying the center point before drilling. Using an awl or a sharp object, create a small indentation at the desired center. This method is simple and effective for visual alignment. For greater precision, a center-punch can be struck with a hammer to mark the exact center point. Ensure the workpiece is secure to avoid movement during marking. Another technique involves scribing lines across the workpiece to find the intersection point, which indicates the center. Using a combination square can also aid in aligning marks accurately. These manual methods are cost-effective and reliable when precision tools are unavailable. Always double-check the marks to ensure they align with your project requirements. Proper manual marking is the foundation for accurate drilling and prevents costly errors. By mastering these techniques, you can achieve professional results in various projects.
3.2 Using Precision Tools for Center Marking
For high accuracy, precision tools are indispensable in center marking. A center drill or spot drill is ideal for creating a starter hole, ensuring the drill bit aligns perfectly. Transfer punches are another excellent option, allowing precise transfer of center marks from one surface to another. Vix bits, with their tapered ends, help locate the center accurately, especially on flat surfaces. Drill guides and self-centering dowel jigs also simplify the process by holding the drill bit in place over the mark. These tools minimize human error and ensure consistency. When combined with a drill press or CNC router, they enhance precision further. For intricate projects, optical centering tools or laser markers can be used to achieve pinpoint accuracy. Investing in these precision tools ensures that your center marks are reliable, leading to straight, well-aligned holes every time. This level of accuracy is crucial for professional results in woodworking, metalworking, and machining projects.
Setting Up Your Drill Press
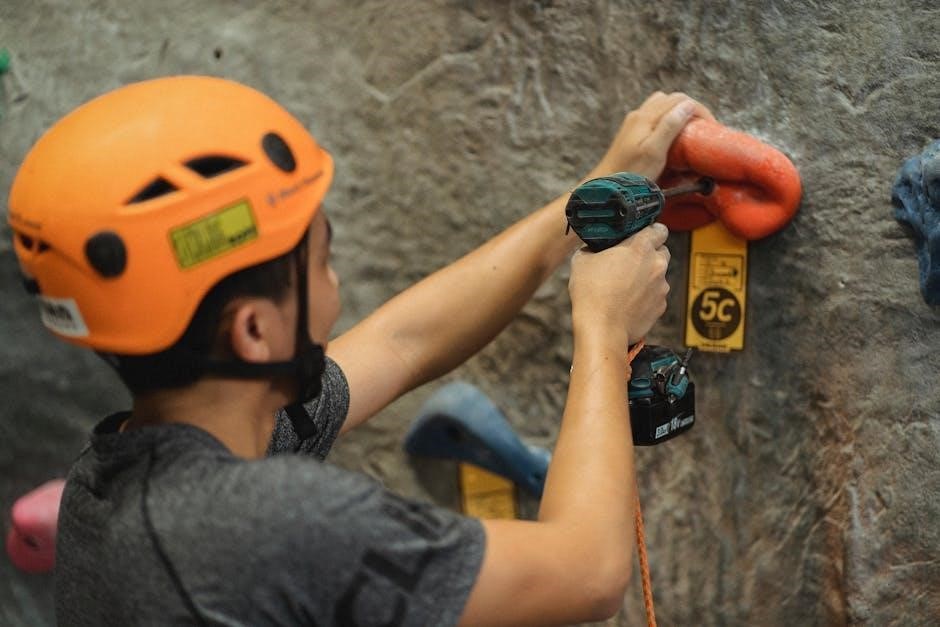
Setting up your drill press involves aligning the drill bit with the center mark and securing the workpiece firmly. Use center drills and guides to enhance precision and stability during drilling operations.
4.1 Aligning the Drill Bit with the Center Mark
Aligning the drill bit with the center mark is critical for achieving precise and accurate drilling results. Start by positioning the workpiece on the drill press table, ensuring it is secure and level. Use a center drill or a spotting drill to create a pilot hole at the marked center point. This step ensures the larger drill bit will follow the same path without wandering. Next, adjust the drill press table height so the drill bit aligns perfectly with the pilot hole. Use a drill press with a rigid construction to maintain stability during operation. For enhanced accuracy, consider using a drill press laser guide or an alignment jig. Finally, double-check the alignment by visually inspecting the drill bit’s position relative to the center mark before starting the drill. Proper alignment ensures straight, centered holes and prevents costly mistakes.
4.2 Securing the Workpiece Properly
Securing the workpiece properly is essential for accurate drilling and safety. Use a high-quality drill press vise or clamps to hold the material firmly in place, ensuring it doesn’t move during operation. For irregularly shaped workpieces, consider using jigs or custom fixtures to maintain stability. Always ensure the workpiece is flat and even on the drill press table to prevent uneven drilling. Clean both the table and the workpiece to remove any debris that could interfere with proper clamping. Use non-slip mats or adhesive-backed neoprene to prevent slippage. Double-check the tightness of clamps or vise to ensure the workpiece is immobilized. Improper securing can lead to misaligned holes, damaged materials, or even accidents. For added precision, use a drill press with a locking table or a power feed to maintain consistent control. Always ensure the workpiece is centered and aligned before drilling. Proper securing ensures safety and delivers professional-grade results.

The Drilling Process
The drilling process begins with a pilot hole to guide the drill bit, ensuring accurate alignment. Maintain steady feed rates and keep the bit perpendicular to the workpiece for straight, centered holes.
5.1 Starting with a Pilot Hole
Starting with a pilot hole is essential for achieving precise drill centering. A pilot hole acts as a guide, ensuring the larger drill bit remains aligned and centered. Use a center drill or a small twist drill to create this initial hole. This step prevents the drill bit from wandering and improves accuracy. The pilot hole should be drilled slowly and at a reduced feed rate to maintain control. Ensure the workpiece is securely clamped to prevent movement during drilling. Proper alignment is critical at this stage, as any deviation will affect the final hole’s accuracy. Using the correct drill bit type and maintaining consistent pressure will help achieve a straight and centered pilot hole. This foundational step sets the stage for successful drilling, especially in materials like metal or hardwood, where precision is paramount. Always use a drill press for better control and stability when creating pilot holes.
5.2 Maintaining Drill Bit Alignment
Maintaining drill bit alignment is crucial for ensuring the accuracy and precision of your drilled holes. After creating the pilot hole, align the drill bit carefully with the center mark, using visual cues or precision tools to guide it. Reducing the RPM of the drill press can help improve control, especially when working with hard materials like metal or dense wood. Apply steady, consistent pressure to prevent the bit from deflecting or wandering. Using a drill guide or jig can also enhance alignment, particularly for complex or repetitive tasks. Regularly inspecting the drill bit for wear and ensuring it is sharpened will further aid in maintaining straight, centered holes. Proper workpiece clamping is essential to prevent movement during drilling, which could disrupt alignment. By combining these techniques, you can achieve consistently accurate results and maintain the integrity of your workpiece.

Tips for Maintaining Accuracy
Use drill guides or jigs to enhance precision, ensuring consistent alignment. Regularly inspect and sharpen drill bits to prevent wandering. Maintain steady pressure and proper workpiece clamping for precise, accurate results.
6.1 Avoiding Drill Bit Wander
Drill bit wander occurs when the bit deviates from the intended center mark, leading to inaccurate holes. This issue is common in materials like metal or hardwood. To prevent this, ensure proper alignment of the drill bit with the center mark before starting. Using a center drill or a spot drill can create a pilot hole, guiding the twist drill and reducing the likelihood of wander. Additionally, maintaining sharp drill bits is crucial, as dull bits are more prone to slipping. Proper clamping of the workpiece on a stable surface ensures it doesn’t move during drilling. Applying steady, consistent pressure on the drill press or hand drill also helps maintain alignment. Regularly inspecting the drill bit for wear and replacing it when necessary further enhances accuracy. By following these steps, you can minimize drill bit wander and achieve precise, centered holes consistently.
6.2 Using Drill Guides and Jigs
Drill guides and jigs are essential tools for maintaining precision when drilling centered holes. These accessories help align the drill bit accurately with the center mark, reducing the risk of misalignment. Self-centering dowel jigs, for instance, clamp onto the workpiece and automatically center the drill bit, making them ideal for woodworking projects. Similarly, metal drilling jigs provide a stable platform for precise hole placement in materials like aluminum or steel. Adjustable drill guides allow for flexibility, accommodating different drill bit sizes and hole depths. By using these tools, you can achieve consistent results without constant adjustments. Clamping the jig tightly to the workpiece ensures stability, further enhancing accuracy. Drill guides and jigs are invaluable for both professionals and DIYers, ensuring precise, centered holes in various materials every time.

Common Mistakes to Avoid
Common errors include misaligning the drill bit with the center mark and using incorrect drill bit types. These mistakes can lead to off-center holes and reduced precision in your work.
7.1 Misalignment of the Drill Bit
Misalignment of the drill bit is a common mistake that can lead to inaccurate holes and reduce the overall quality of your work. This occurs when the drill bit does not align perfectly with the center mark, causing the hole to drift or wander; Even a slight misalignment can result in off-center holes, which can compromise the stability and functionality of the final product. This issue is particularly problematic in precision applications, such as machining or metalworking, where exact alignment is critical. To avoid misalignment, ensure the drill bit is properly secured and aligned with the center mark before starting the drill. Using a pilot hole or center drill can help guide the bit and maintain accuracy. Additionally, always double-check the alignment visually or with precision tools before drilling. Proper setup and focus are key to preventing this common error and achieving professional results.
7.2 Using the Wrong Drill Bit Type

Using the wrong drill bit type is another common mistake that can severely impact the accuracy of your center drilling. Different materials require specific drill bit types, and using an inappropriate one can lead to poor hole quality, uneven surfaces, or even damage to the workpiece. For example, using a general-purpose twist drill instead of a center drill can result in misaligned holes and poor surface finish. Center drills, with their tapered shanks and angled points, are specifically designed for creating precise pilot holes and ensuring accurate centering. Choosing the wrong bit can also increase the risk of drill bit wandering, making it difficult to maintain the desired alignment. Always select a drill bit that matches the material you are working with and the specific requirements of your project. This ensures better control, accuracy, and a professional finish in your drilling operations.

Safety Considerations
Always wear safety glasses and gloves when drilling. Ensure loose clothing is tied back. Keep the workpiece firmly secured to prevent movement during drilling.
8.1 Safe Drilling Practices
Drilling requires careful attention to safety to prevent accidents. Always wear safety glasses or goggles to protect your eyes from debris. Keep loose clothing or long hair tied back to avoid entanglement with the drill. Ensure the workpiece is securely clamped or held in a vice to prevent it from moving during drilling, which could cause loss of control or damage to the tool.
Avoid wearing jewelry, especially rings, as they can catch on moving parts. Use proper stance and maintain a firm grip on handheld drills. Never reach across moving parts or lean over the drill press while it is operational. Keep children and pets away from the drilling area. Regularly inspect drill bits for damage or wear, as dull or damaged bits can lead to unpredictable behavior during drilling.
Ensure good lighting in the workspace to clearly see the drill bit and workpiece alignment. Avoid overreaching or stretching, which can lead to loss of balance; Always follow the manufacturer’s guidelines for drill press and tool usage. Maintain a clean, uncluttered workspace to reduce tripping hazards and improve visibility.
8.2 Personal Protective Equipment (PPE)
Personal protective equipment is essential for safeguarding against injuries during drilling operations. Always wear safety glasses or goggles to protect your eyes from flying debris or sparks. Hearing protection, such as earplugs or earmuffs, is crucial when using loud machinery like drill presses. Gloves provide grip and prevent hand injuries from sharp edges or slipping tools.
A dust mask or respirator is recommended when drilling materials that generate dust or harmful particles. Steel-toe shoes or work boots protect feet from heavy objects or tool accidents. Loose clothing and long hair should be secured to avoid entanglement with moving parts. Additionally, a face shield can offer extra protection when working with metals or materials that produce excessive sparks.
Ensure all PPE fits properly and is in good condition. Regularly inspect items like gloves and eyewear for damage. Proper use of PPE significantly reduces the risk of injury, making it a critical component of safe drilling practices. Always prioritize PPE to maintain a safe and efficient workspace.

