instruction manual for white sewing machine
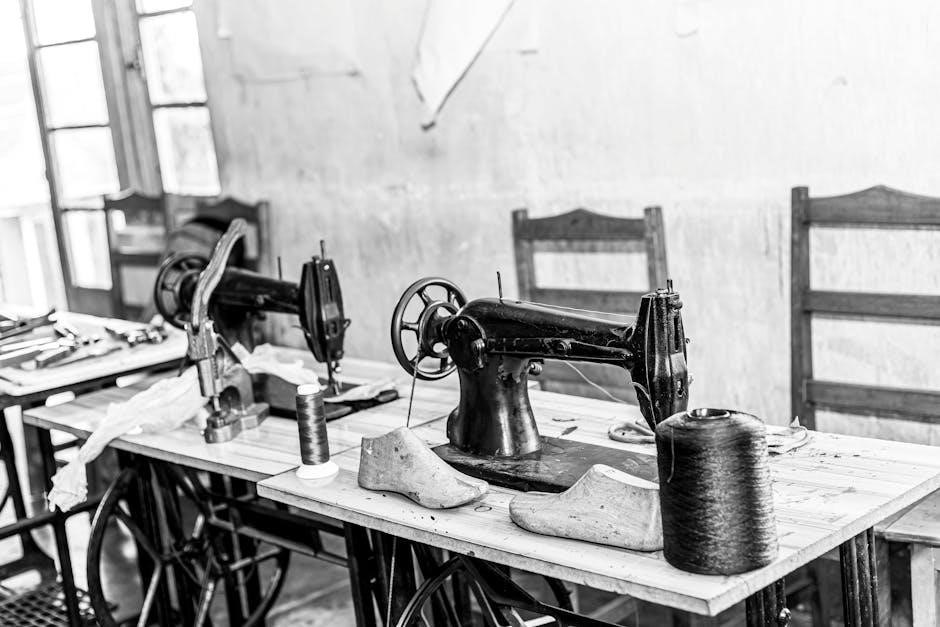
White sewing machines, documented since 1959 with manuals like the White 1514 guide, boast a rich history and enduring popularity amongst sewing enthusiasts.
Early models, such as the White Rotary 41 (1938), demonstrate a commitment to quality instruction for users navigating these mechanical marvels.
Historical Overview of White Sewing Machine Company
White Sewing Machine Company’s legacy began in 1876, evolving from the White Sewing Machine Manufacturing Company. Initially focused on producing clones of the popular Singer sewing machine, White quickly established its own identity through innovation and quality craftsmanship.
The company’s early instruction manuals, like those for the Rotary models from 1938, were crucial for users adapting to these new technologies. As the 20th century progressed, White continued to refine its designs, releasing iconic models such as the White 1514 in 1959, accompanied by detailed user guides.
These manuals weren’t merely operational guides; they represented White’s dedication to empowering home sewers. The availability of comprehensive documentation, even decades later, underscores the company’s commitment to supporting its customers and preserving its heritage.
Popular White Sewing Machine Models
Several White sewing machine models have garnered significant recognition, often accompanied by readily available instruction manuals. The White Rotary 41, documented in a 1938 manual, represents an early example of the company’s commitment to user support. Later, the White 1514, with its 1959 publication, became a beloved workhorse for home sewers.
These models, and others within the White lineup, benefited from detailed guides explaining operation, maintenance, and troubleshooting. The existence of these manuals, even today, facilitates restoration and continued use.
Finding these resources online allows enthusiasts to maintain these vintage machines, ensuring their longevity and celebrating White’s enduring contribution to the world of sewing.
Understanding Your White Sewing Machine
Instruction manuals, like those for the White 1514, are crucial for deciphering the machine’s components and functions, ensuring proper operation and maintenance.
Identifying Key Components
White sewing machine instruction manuals, such as the one for the White 1514, meticulously detail each part. Key components include the handwheel, used for manual control, and the power switch, initiating operation.
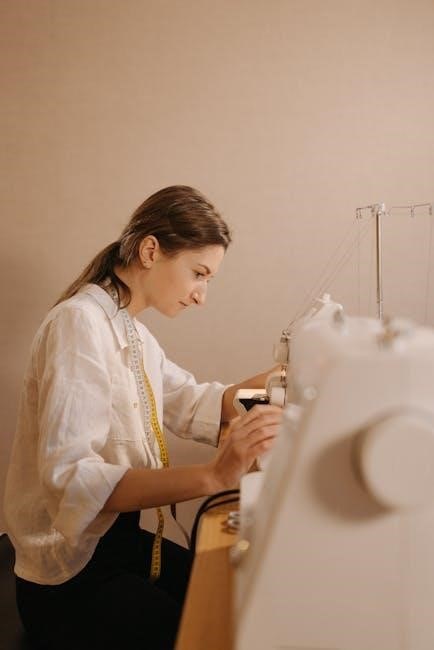
The spool pin securely holds the thread, while the bobbin winder prepares the bobbin for use. The presser foot applies pressure to the fabric, and the needle, guided by the needle clamp, creates the stitches.
Understanding the feed dogs, which advance the fabric, and the stitch length dial, controlling stitch size, is vital. The reverse lever enables backstitching for secure seams. Familiarizing yourself with these parts, as outlined in the manual, is essential for successful sewing.
The Bobbin System Explained
White sewing machine manuals, like those for the White 1514, dedicate significant attention to the bobbin system. This system is crucial for forming the lower part of the stitch. The bobbin case holds the bobbin, ensuring smooth unwinding of the thread.
Proper bobbin winding, detailed in the instructions, is essential for even stitching. The manual illustrates how to insert the bobbin correctly into the case and then into the machine.
Understanding the bobbin tension is vital; adjustments impact stitch quality. A correctly balanced bobbin system, as described in the manual, guarantees consistent and reliable stitch formation, preventing looping or puckering.
Needle and Presser Foot Basics
White sewing machine instruction manuals, including guides for models like the White 1514, emphasize the importance of correct needle and presser foot selection. Different fabrics require different needle types and sizes for optimal performance.
The manual details how to properly insert the needle, ensuring it’s securely fastened. It also explains the function of the presser foot – holding the fabric in place while stitching.
Adjusting presser foot pressure is crucial for various materials; lighter fabrics need less pressure. Understanding these basics, as outlined in the manual, prevents skipped stitches and ensures even fabric feed.
Setting Up Your White Sewing Machine
White sewing machine manuals detail essential setup steps: winding the bobbin, correctly threading the needle, and precisely adjusting thread tension for optimal stitch quality.
Winding the Bobbin
Winding the bobbin is a foundational step, meticulously outlined in White sewing machine instruction manuals. Begin by placing the spool of thread onto the spool pin, ensuring it rotates freely. Next, guide the thread through the thread guides, typically located near the handwheel.
Engage the bobbin winder by sliding it to the right. Then, carefully insert the empty bobbin onto the bobbin winder spindle. Hold the thread tail firmly as you begin winding by gently pressing the foot pedal.
Most White machines automatically stop when the bobbin is full. Disengage the winder, remove the bobbin, and secure the thread end. Proper winding ensures even stitches and prevents thread breakage during sewing, as detailed in the White 1514 manual.
Threading the Needle
Threading the needle, a crucial skill detailed in White sewing machine manuals, requires precision. Start by raising the presser foot; this opens the tension discs. Guide the thread from the spool, through the designated thread guides, often numbered for clarity.
Next, pass the thread through the tension assembly, ensuring it’s firmly seated between the discs. Continue threading the take-up lever, and finally, thread the needle from front to back.
Draw a sufficient length of thread through the needle’s eye – approximately 4-6 inches. Lower the presser foot to re-engage the tension. As the White 1514 manual illustrates, correct threading is vital for consistent stitch formation and preventing skipped stitches.
Adjusting Thread Tension
Thread tension, a key element covered in White sewing machine instruction manuals, directly impacts stitch quality. Improper tension leads to looping, puckering, or thread breakage. The tension dial, typically numbered, controls the upper thread’s pull.
Generally, a higher number increases tension, while a lower number decreases it. Begin with the manufacturer’s recommended setting – often ‘4’ or ‘5’. Test sew on scrap fabric. If the bobbin thread pulls to the top, loosen the upper tension.
Conversely, if the upper thread pulls to the bobbin side, tighten it. Refer to your White manual for specific guidance, as optimal tension varies with fabric type and thread weight.
Basic Sewing Techniques
White sewing machine manuals detail fundamental techniques like straight, zigzag, and backstitching, essential for garment construction and repairs, ensuring quality results.
Straight Stitching
White sewing machine instruction manuals consistently emphasize the straight stitch as the foundational technique for most sewing projects. Achieving a consistent stitch length is paramount; manuals often illustrate adjustments for varying fabric weights.
Begin by selecting the straight stitch setting on your White machine, typically indicated by a straight line symbol. Practice on scrap fabric to establish even seam allowances, guided by the presser foot edge.
Maintain a steady, moderate pace, allowing the machine to feed the fabric smoothly. Avoid pulling or pushing the material, as this can distort the stitch. Refer to your specific model’s manual for recommended stitch lengths for different applications – shorter for delicate fabrics, longer for heavier materials. Consistent practice, as detailed in the guides, builds proficiency.
Zigzag Stitching
White sewing machine manuals detail zigzag stitching as a versatile technique beyond simple seam construction. It’s crucial for finishing raw edges, preventing fabric fraying, and adding decorative elements.
Select the zigzag stitch setting, identified by a zigzag symbol, and adjust the stitch width and length according to your project needs. Wider stitches are ideal for edge finishing, while narrower stitches are suitable for reinforcing seams.
Practice on scrap fabric to understand how different settings affect the stitch appearance. Manuals often demonstrate using zigzag for stretch fabrics, allowing for seam give. Remember to guide the fabric gently; avoid forcing it, ensuring a neat, even zigzag line. Mastering this stitch expands your sewing capabilities significantly.
Backstitching
White sewing machine instruction manuals emphasize backstitching as a fundamental technique for securing seams. It prevents unraveling, ensuring garment durability. Begin and end each seam with a short backstitch – typically a few stitches reversed over the initial and final stitches.
Most White machines feature a dedicated backstitch lever or button. Engage this function before reaching the seam’s end, then sew backwards for a short distance. Return to forward stitching to continue the seam.
Consistent backstitching length is key for a professional finish. Avoid excessively long backstitches, which can create bulk. Practice on scrap fabric to achieve a smooth, secure seam termination. This simple step dramatically increases the longevity of your projects.
Advanced Sewing Features (Model Dependent)
White sewing machine manuals detail features like buttonhole and zipper attachments, alongside decorative stitch options, varying significantly based on the specific model purchased.
Buttonhole Attachment Usage
White sewing machine instruction manuals dedicate specific sections to utilizing buttonhole attachments, crucial for creating professional-looking buttonholes. These attachments, often model-dependent, typically involve a specialized presser foot and potentially a cam system.
The manual guides users through correctly installing the attachment, adjusting stitch width and length settings for desired buttonhole size, and understanding the sequence of operations – often involving rotating a dial or lever with each stitch.
Detailed diagrams illustrate proper fabric placement and the importance of maintaining consistent sewing speed. Troubleshooting tips address common issues like uneven buttonholes or thread bunching, emphasizing the need for correct attachment installation and tension adjustments as outlined in the manual.
Zipper Foot Application
White sewing machine manuals provide detailed instructions for utilizing zipper feet, essential for achieving neat and professional zipper insertions. These feet, often snap-on, allow for close stitching alongside the zipper teeth, preventing fabric bunching and ensuring a clean finish.
The manual illustrates the correct foot installation and demonstrates how to adjust the needle position – typically moving it closer to the zipper – for optimal stitching. It guides users through sewing both standard and invisible zippers, detailing specific techniques for each.
Troubleshooting sections address common issues like skipped stitches or uneven zipper alignment, emphasizing the importance of using the correct foot and maintaining consistent sewing speed as detailed within the manual’s guidance.
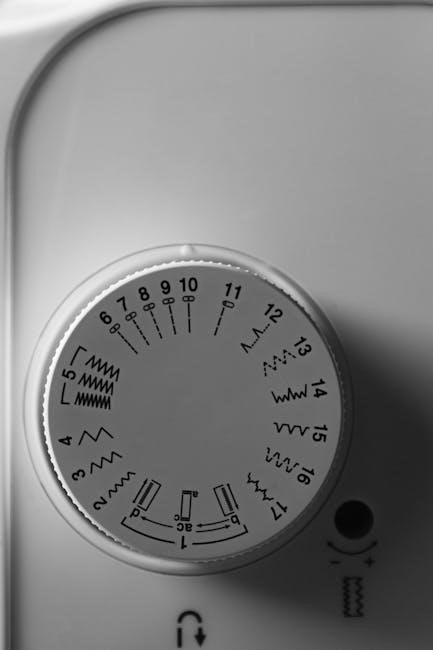
Decorative Stitch Selection
White sewing machine instruction manuals showcase a variety of decorative stitch options, enhancing projects beyond basic seams. These manuals detail each stitch’s unique application – from simple embellishments to intricate patterns – providing stitch width and length recommendations for optimal results.
Users learn to select stitches via dials or electronic interfaces, depending on the model. The manual often includes sample stitch charts, visually demonstrating the stitch patterns on fabric. It emphasizes the importance of test stitching on scrap fabric before applying to the final project.
Troubleshooting sections address issues like uneven stitches or thread breakage when using decorative settings, guiding users to adjust tension and needle type for flawless execution.

Maintenance and Troubleshooting
White sewing machine manuals prioritize upkeep, detailing cleaning procedures, oiling points, and solutions for common issues like threading problems and tension imbalances.
Cleaning Your White Sewing Machine
Regular cleaning is crucial for maintaining optimal performance, as detailed in White sewing machine instruction manuals. Begin by disconnecting the power source for safety. Use a soft brush to remove lint and dust from the bobbin area, feed dogs, and around the needle plate.
A small vacuum cleaner attachment can also be helpful for reaching tight spaces. Wipe down the exterior surfaces with a slightly damp cloth; avoid harsh chemicals or abrasive cleaners. Pay attention to oil buildup, as it attracts dust. The manual emphasizes cleaning after each use to prevent issues and ensure longevity. Proper cleaning contributes significantly to smooth operation and extends the machine’s lifespan.
Oil Points and Lubrication
White sewing machine manuals consistently highlight the importance of lubrication for smooth operation. Locate designated oil points – typically indicated in the manual’s diagrams – and apply a few drops of sewing machine oil. Key areas include the bobbin race, shuttle hook, and any moving parts like levers and gears.
Avoid over-oiling, as excess oil attracts dust and can cause problems. Use only sewing machine oil; other lubricants may damage the machine. Regular oiling, as per the manual’s recommendations, minimizes friction, prevents wear, and ensures consistent stitch quality. Proper lubrication is vital for maintaining the machine’s longevity and performance.
Common Problems and Solutions
White sewing machine manuals often dedicate sections to troubleshooting. A frequent issue is thread breakage, often caused by incorrect threading, a dull needle, or improper tension. Another common problem is skipped stitches, potentially stemming from incorrect needle size or a damaged needle plate.
If the machine jams, carefully remove the bobbin case and clear any tangled threads. Consult the manual for specific diagrams. Loud noises may indicate a lack of lubrication or a loose part. Always unplug the machine before attempting any repairs. Following the manual’s guidance can resolve many issues, preventing costly servicing.
Troubleshooting Threading Issues
White sewing machine manuals emphasize correct threading as crucial for smooth operation. If thread consistently breaks, re-thread the entire machine, ensuring the presser foot is raised – this opens the tension discs. Verify the thread path matches the manual’s diagrams precisely. Incorrect threading is a primary cause of tension problems.
Bobbin threading errors are also common; ensure the bobbin is wound evenly and inserted correctly; If the upper thread isn’t catching the bobbin thread, double-check the needle is properly inserted and the bobbin case is seated correctly. Refer to the manual’s illustrations for clarity.
Addressing Tension Problems
White sewing machine manuals detail tension adjustment as vital for balanced stitches. Loops on the underside of the fabric indicate loose lower tension; tighten the bobbin tension screw slightly. Conversely, loops on the top suggest tight lower tension – loosen the screw.
Upper tension issues manifest as puckering or thread breakage. Adjust the upper tension dial incrementally, testing after each adjustment with scrap fabric. Always use the same thread weight for both spool and bobbin. Incorrect tension often stems from improper threading, so revisit those steps first, consulting the manual’s diagrams.
Specific Model Instructions (White 1514 as Example)
White 1514 manuals (published 1959) provide detailed stitch settings and unique features, mirroring the broader White sewing machine quality and user-friendly design.
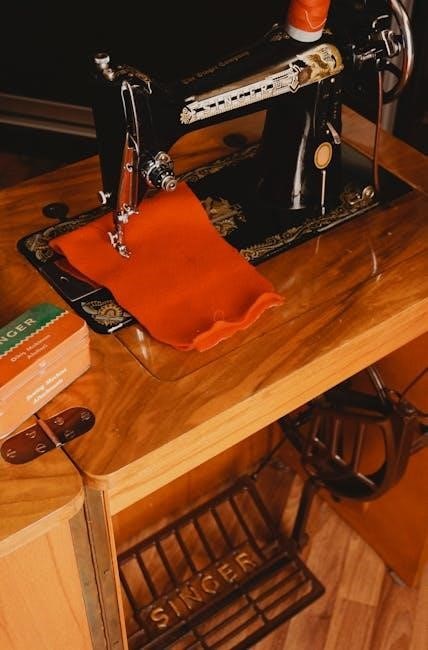
White 1514: Unique Features
The White 1514, as detailed in its 1959 instruction manual, distinguishes itself through a robust, fully rotary mechanism, offering smooth and reliable operation. Unlike some contemporaries, it features a streamlined design prioritizing ease of use for both beginners and experienced sewers.
A key characteristic is its adaptability – capable of handling a wide range of fabrics, from lightweight cottons to heavier denim. The manual highlights the machine’s ability to create diverse stitch patterns, extending beyond basic straight and zigzag stitches.
Furthermore, the White 1514 boasts a durable construction, ensuring longevity with proper maintenance, as outlined in the user guide. Its compatibility with Singer 15 parts further enhances its practicality and repairability, making it a favored choice for decades.
White 1514: Stitch Settings Guide
The White 1514 instruction manual provides a comprehensive stitch settings guide, crucial for achieving optimal results; For standard sewing on medium-weight fabrics, a stitch length of 2.5mm and a tension setting of ‘4’ are recommended as starting points.
Zigzag stitches, ideal for finishing raw edges or creating decorative effects, require adjustments based on fabric type and desired width. The manual details settings for narrow, medium, and wide zigzag variations.
Backstitching, essential for securing seams, is activated via a dedicated lever. The guide emphasizes the importance of consistent backstitching length (approximately 5mm) for durability. Experimentation, guided by the manual’s illustrations, is encouraged to personalize stitch settings.
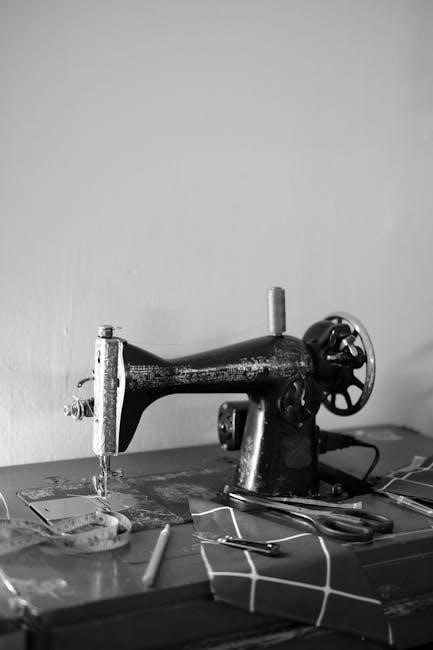
White 1514: Parts Diagram
The White 1514 instruction manual features a detailed parts diagram, vital for maintenance and repair. This exploded view clearly labels components like the handwheel, bobbin winder, presser foot, feed dogs, and needle clamp.
Key internal parts, including the shuttle hook, tension discs, and various gears, are also identified. The diagram assists in understanding the machine’s mechanics and facilitates accurate parts ordering when replacements are needed.
Numbered callouts correspond to a comprehensive parts list within the manual, specifying part numbers for easy identification. Careful study of this diagram empowers users to confidently disassemble and reassemble the White 1514.
Resources and Support
Online, discover White sewing machine manuals and parts, alongside vibrant sewing communities and forums offering assistance with your vintage machine.
Finding White Sewing Machine Manuals Online
Locating original White sewing machine manuals can significantly enhance your sewing experience, especially for vintage models. Several online resources specialize in archiving and distributing these valuable documents. Websites dedicated to preserving historical manuals often host scans of publications like the White 1514 manual, dated 1959, and earlier editions such as the White Rotary 41 instruction booklet from 1938.
Internet Archive and similar digital libraries are excellent starting points. Dedicated sewing machine enthusiast forums frequently have sections where members share downloadable manuals. When searching, be as specific as possible with the model number to ensure you find the correct documentation. Remember to verify the manual’s authenticity and completeness before relying on its instructions.
White Sewing Machine Parts Suppliers
Sourcing replacement parts for White sewing machines, particularly older models referenced in manuals like the White 1514 (1959) and White Rotary 41 (1938), requires specialized suppliers. While White no longer manufactures machines, several businesses cater to vintage sewing machine restoration.
Online retailers specializing in vintage parts often carry White-specific components. Auction sites can also be fruitful, but require careful inspection of part compatibility. Local sewing machine repair shops may have access to parts networks or be able to fabricate replacements. When ordering, always confirm the part number against your machine’s manual to ensure a proper fit and function, maximizing your sewing machine’s longevity.
Online Sewing Communities and Forums
Navigating the intricacies of a White sewing machine, especially when referencing older manuals like those for the White 1514 (1959) or White Rotary 41 (1938), is often easier with community support. Numerous online forums and sewing groups provide platforms for sharing knowledge and troubleshooting.
These communities are invaluable for deciphering manual instructions, identifying parts, and finding solutions to common problems. Members frequently share digitized manuals, repair tips, and experiences with specific White models. Engaging with experienced users can accelerate your learning curve and ensure your machine continues to function optimally, preserving a piece of sewing history.
Safety Precautions
Always prioritize safety when using your White sewing machine, referencing the instruction manual for guidance. Electrical safety and general machine operation are key.
General Sewing Machine Safety
Before operating your White sewing machine, carefully review the instruction manual’s safety section. Keep fingers and other body parts clear of the needle while sewing; accidental contact can cause injury.
Never force the fabric through the machine; let the feed dogs do the work. Disconnect the power supply when changing the needle, threading, or performing any maintenance. Always use the correct needle type for your fabric to prevent breakage and potential hazards.
Ensure the machine is placed on a stable, level surface during operation. Avoid sewing over pins, as they can damage the needle and potentially cause injury. Keep the machine clean and free of debris to maintain safe operation; A well-maintained machine is a safer machine!
Electrical Safety
Always verify that your White sewing machine’s voltage matches your household electrical supply, as detailed in the instruction manual. Never operate the machine with a damaged power cord or plug; replace them immediately.
Avoid using extension cords if possible, and if necessary, ensure they are properly grounded and rated for the machine’s power requirements. Never immerse the machine, power cord, or plug in water or other liquids.
Disconnect the machine from the power outlet before cleaning, changing parts, or performing any maintenance. Do not attempt to repair the electrical components yourself; seek qualified service personnel. Grounding is crucial for preventing electrical shock – consult the manual for specifics.